Here is one of the larger filaments on Sun today.
Best prominence today 8 July 2013
This is the best prominence today on the Sun.. lovely fire here!
AR 1785 on 8 July 2013
This is how it has been changed in about 24 hours. I tried not to 'burn' bright pixels by keeping the exposure a bit down but i do like to make the 'Plage' a bit brighter, more on the bluish side.
Solar Disk with AR 1785
okay so here is the whole disk of the sun.. as usual, four mosaic with different processed flavor.
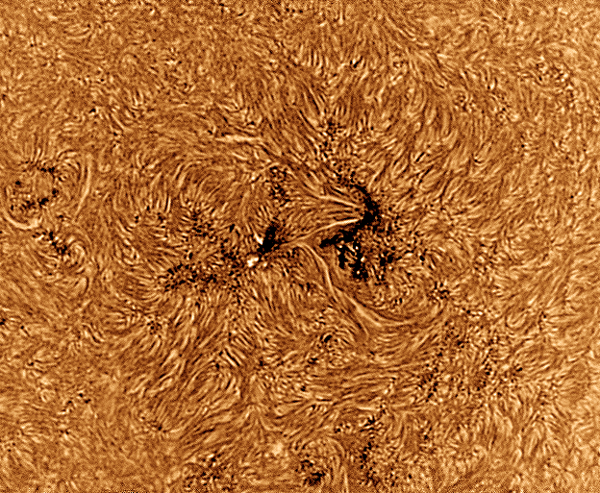
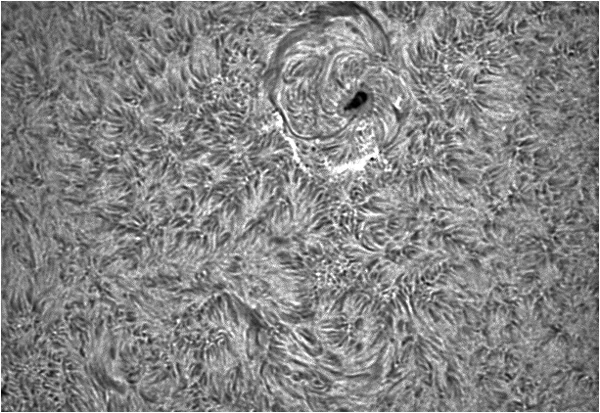
AR 1785, Active Sunspot Region
According to spaceweather.com, in less than 24 hours this sunspot region has stretched by more than 40,000 km. I cannot image sunspots these days but i can use h-alpha telescope to see the region.. here it is in color.. look how strong the bright plage features are, a sure sign of strong magnetic activity.
Following is the picture taken from Damien Peach yesterday. This image was taken with the visible light and 356mm telescope. Same area on the sun, but in two different lights.
No solar imaging today either
okay.. so this is the picture of the Sun.. but not the one i would ever enjoy to take. I waited for about 2 hours to see if the clouds move away but they did not. Not happy at all.
No Solar Imaging today
Hi everyone.. i have been imaging the Sun daily for a few days now but today thin clouds were ruining the sky and they held me back from reaching to the Sun and grounded me for today. Sorry, no solar proms from my telescope today :(
Tomorrow i should try to get as many as possible with my 'humble' 60 mm scope and DMK21 camera.
Full Solar Disk - 4 July 2013
When i upload the images of the prominence, i start to get the requests for the picture of the whole disk of the Sun. With 'Imaging Source DMK21 camera, i have a comparatively small CCD chip. This works well because i can get to 60 fps with totally uncompressed raw images. The trade-off is that i can image a very small portion of the sky.
To image the whole disk of the Sun, today i removed the 2.5X barlow (which obviously zooms the view 2.5 times) between the camera and the 60 mm telescope.. this still does not give me the whole disk of the sun. So to capture the whole disk, i must record 4 different AVI of each quadrant of the Sun.
I went upto 10,000 images in less than 3 minutes and used a 1,000 to stack and process with my usual routine. Photoshop was not behaving with its Automate-Photomerge feature so i had to stitch each image manually.. its really hard to manage the brightness/contrast this way.
Here are the final images.. Which is the best one for you?
Prominence - 4 July 2013
Not much for the prominence today.. Here is the best out there right now.
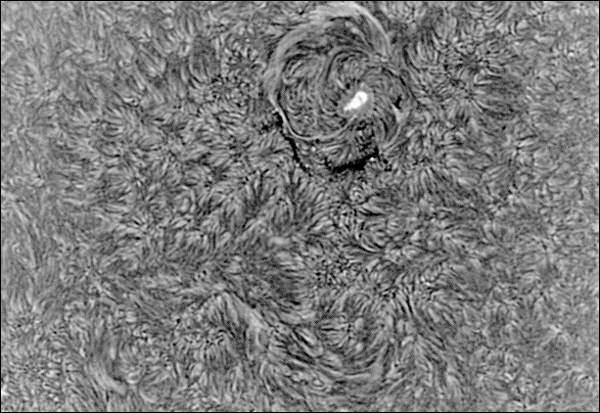
Disk view of 3 July 2013
Once again an inverted processing.. if you are in a good mood it may feel as 3D view of the Sun.
More from 3 July 2013
I tried a little different approach here. These are pseudo colors of course but i first inverted the B/W image and then colored it like this.. also made the sky black which was all white when i inverted the image.
More prominence from 3 July
This is beautiful folks! I processed it with more care than my earlier previous images.
Prominence 3 July 2013
These are a few prominence today on the Sun
Prominence on 2 July 2013
Here is an other beautiful prominence on the solar limb today.. Truly sun is on fire!
Nice prominence on 1st July 2013
I am not very happy with the processing of this image since i lost some very dim details in the prominence while coloring it in photoshop.. but this is the best i could do with it so far. This is a combined image of two separate high and low exposures of the same area of the Sun and this way i was able to capture both the very faint prominence and the bright solar disk.
I like the B/W image much more than the colored image here. What i have found, during my astronomical imaging routines is that every image is different in terms of processing. I really feel the need to make AVI with at least three exposure/gain/brightness etc settings to do the justice for bringing out details. I would try to do that tomorrow morning. The only thing that worries me is the extreme heat i face everyday while capturing these files. I miss my observatory!
This was the best prominence today on the Sun. The fast movement of matter in some parts can be noticed because of a blurry effect. I could have made a nice animation out of it but that needs a precise polar alignment which i have not yet done with this new mount so until then, enjoy the still images.
More from 28 June 2013
This seems interesting..


More from 27 June 2013
Here are some more pictures from 27th June.


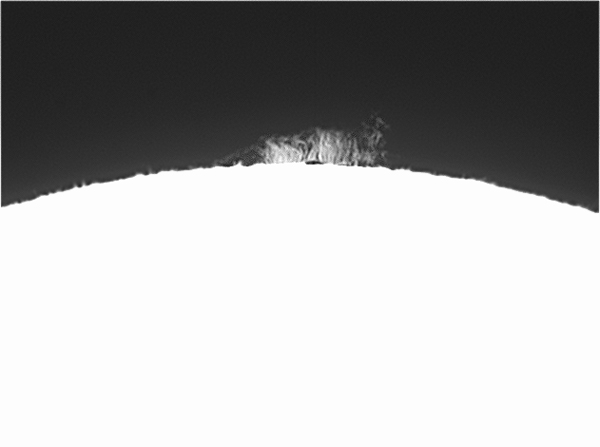
Measuring the real size of a prominence
Lets start with an original image, no cropping no scaling. Below is the stack of 5 images (this is to keep the noise a bit down) from the raw AVI file i captured with an Imaging Source camera, DMK21. Posting this image on the web will change the actual size of the image but the original image is 640 * 480 pixels in size.
First we need to find the Imaging Scale of my setup. I am using Lunt 60 telescope which has an aperture of, you guessed it, 60mm. Next the focal length of this telescope is 500 mm. Dividing both numbers give us the f/ratio of 500/60= 8.33
I am also using a 2.5X barlow lens from televue (one of the best barlow lenses i have ever used). Now lets use this number.. but how?
Astronomy should be fun for those as well who hate maths! (I don't actually hate maths but would love to be lazy enough to allow a calculator doing all the hard work for me). So putting the numbers in CCD Calc, i see focal length becomes 1245 mm and f/ratio is gone at 21.
Each pixel in DMK21 has a measurement of 5.6 micro meter and this gives me an image scale of 0.93 arcsec/pixel. This means that every pixel on my chip is seeing 0.93 arcsecond of the sky (which is very very tiny, Our Sun or Moon you see in the sky is about 1,800 arcseconds is size).
Now i need to find out the area being covered in 0.93 arcseconds. This is also not difficult at all. One of the first formula astronomy students learn is called the small angle formula. This allows to calculate the original height of an object, if we know the angular size of the object and the distance between the observer and the object is known.
I used StarryNight software to see the distance the sun had yesterday at the time of imaging, which was 1.016391237 Astronomical Unit. This corresponds to 1.52049965*10^11 meters. So using the small angle formula, with my setup, 0.93 arecsecond here in this image is equal to 685 km!
To find the angular size of the whole prominence, i used Photoshop to count the pixels, see below:
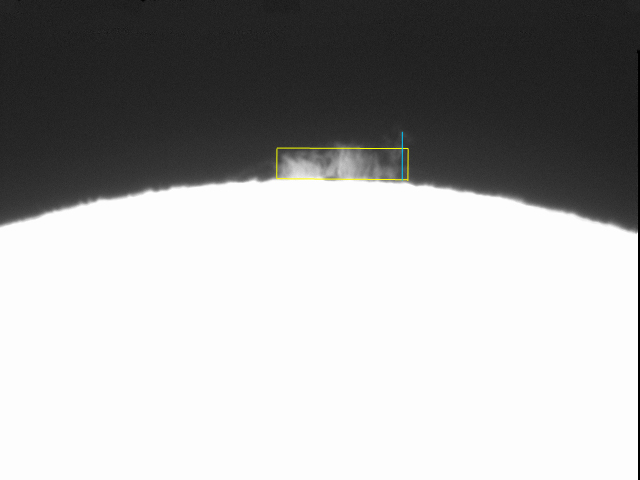
I have marked the prominence in the yellow box to count the height and width of the whole area. On the right is a higher prominence which is marked with blue. After counting the pixels and multiplying it with per pixel area, here are the result.

The height of the highest point on earth is of Mount Everest, which is less than 9 km. Now you can see the highest part (right) of this prominence is more than three thousand and five hundred times of the height of Mount Everest! Imagine standing at the base of this prominence (lets call it a mountain of rising fire) and watching it rise that high in the sky.
The width is about 90,000 km.. this is more than double the length of the distance you would make if you travel the whole planet Earth through the equator.
Now look again on the top image.. how humble and small this prominence looks.. yes, looks can be deceptive.
Solar Disk - 25 June 2013
and here is a beautiful prominence making a loop on the solar disk.. again with variations of image processing. There is nothing else interesting on the disk currently.


Solar Prominences 25 June, 2013
Off i go.. with my new toys, i would like to keep myself busy so here is the first result, a solar prominence. There were very few proms around the solar disk and this i found out to be the best to start off my imaging tests with the new mount. Above are the three flavors of my processing routine. If i could get a hold of it, and the mount proved to have a really good tracking then i will also attempt animation of the proms which i used to do with my previous Losmandy Titan Mount.